HDMI on ZedBoard with Petalinux.

This is step-by-step tutorial on how to build reference design for Analog Devices ADV7511 HDMI encoder used on ZedBoard with PetaLinux 2013.10. It will be mostly based on AD HDL reference design http://wiki.analog.com/resources/fpga/xilinx/kc705/adv7511 and AD Linux drivers wiki page http://wiki.analog.com/resources/tools-software/linux-drivers/platforms/zynq and Xilinx PetaLinux documentation http://www.wiki.xilinx.com/PetaLinux.

As of today, 25 May 2014, to create HDL design for ADV7511 from scratch, we have to use Vivado 2013.4, even though Vivado 2014.1 is already available. The reason is some changes in a Xilinx IP's (which I didn't had a chance to figure out yet) prevent HDL design from build/work properly.

  1. First step is to download HDL libraries and projects from AnalogDevices repositories on a github: https://github.com/analogdevicesinc/hdl. You can clone it or download a ZIP. I will download a ZIP and extract 'hdl-master' in my Projects/FPGA/ folder on Windows7 machine.
  2. Second step is to build a few Analog Devices IP required to create ZedBoard HDMI design. Run Xilinx Vivado 2013.4, open a TCL console, change directories and 'source' a .tcl scripts. For example, to build AXI_CLKGEN IP:

    cd c:/Projects/FPGA/hdl-master/library/axi_clkgen
    source ./axi_clkgen_ip.tcl

    After script finish, close created project and build the next. For ZedBoard we have build the next IP's:

    • hdl-master/library/axi_clkgen
    • hdl-master/library/axi_hdmi_tx
    • hdl-master/library/axi_i2s_adi
    • hdl-master/library/axi_spdif_tx
    • hdl-master/library/util_i2c_mixer
  3. After we done with all required IP's, we can build ADV7511 reference design for ZedBoard. In a Tcl Console change directory to ADV7511 and run 'system_project' script.

    cd c:/Projects/FPGA/hdl-master/projects/adv7511/zed/
    source ./system_project.tcl

    Script will create block design, run synthesis and implementation, generate bitstream and even export software to SDK(without opening it). This was the case on my system - everything went smoothly. We are done with Vivado and can close it.

    We have to create HDL in Vivado 2013.4, but later we can import created project into Vivado 2014.1 and update it to use latest Xilinx IP's.

  4. Let's build a FSBL. We need very typical Zynq first stage boot loader and I covered creation of it before, so now just a short description:
    • Run XSDK.
    • Create new 'Hardware Platform Specification' project (I named it 'ZedBoard-HDMI-HW') and specify HW created in a previous step.
    • Create Application project (named 'ZedBoard-HDMI-FSBL') using our new 'Hardware Platform' and select to create new BSP for it. Don't forget to use 'Zynq FSBL' template. Build it if this not done automatically.
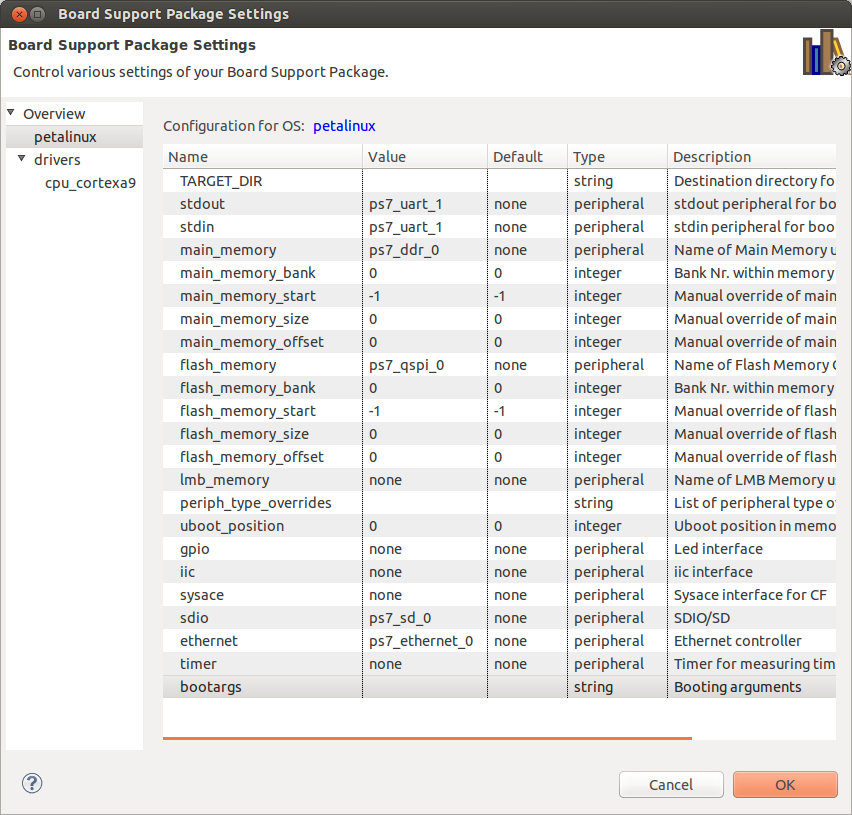
  5. Next step is to create PetaLinux BSP. This is also very typical PetaLinux BSP, just don't forget to change 'Configuration' to reflect ZedBoard configuration and name it 'ZedBoard-HDMI-petalinux_bsp'.

    zynq15_002

    We are done with Xilinx SDK. You can close it.

  6. Next step is to create PetaLinux project and set 'hardware description'. I will call it 'ZedBoard-HDMI' Petalinux project:

    petalinux-create -t project -n ZedBoard-HDMI
    cd ~/Projects/ZedBoard-HDMI-petalinux_bsp/
    petalinux-config --get-hw-description -p ../ZedBoard-HDMI/
    cd ~/Projects/ZedBoard-HDMI/
    rm -r hw-description

  7. Now, as of today, ADV7511 Linux driver not in a mainstream kernel. So, we need to get Kernel from Analog Devices repository with appropriate patches. Current version is 3.14.0. Let's clone it, and checkout 'xcomm_zynq' branch.

    cd ~/Projects/
    git clone https://github.com/analogdevicesinc/linux.git analogdevices-kernel
    cd analogdevices-kernel/
    git checkout xcomm_zynq

  8. Create necessary directories and copy 'xcomm_zynq' branch to our PetaLinux project directory.

    cd ~/Projects/
    mkdir ~/Projects/ZedBoard-HDMI/components
    mkdir ~/Projects/ZedBoard-HDMI/components/linux-kernel
    cp -a analogdevices-kernel ~/Projects/ZedBoard-HDMI/components/linux-kernel/

  9. Run 'petalinux-config' and change kernel to 'analogdevices-kernel' and system boot device to 'SD card'.
  10. cd ZedBoard-HDMI
    petalinux-config

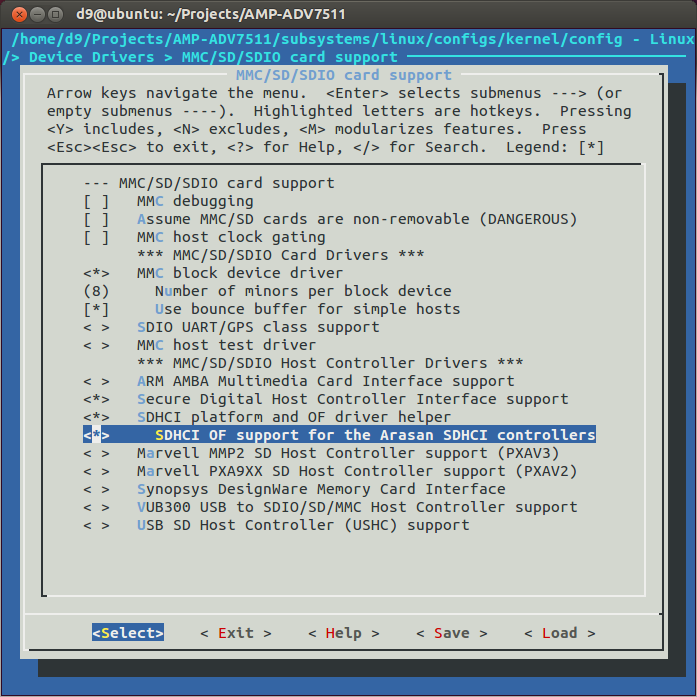
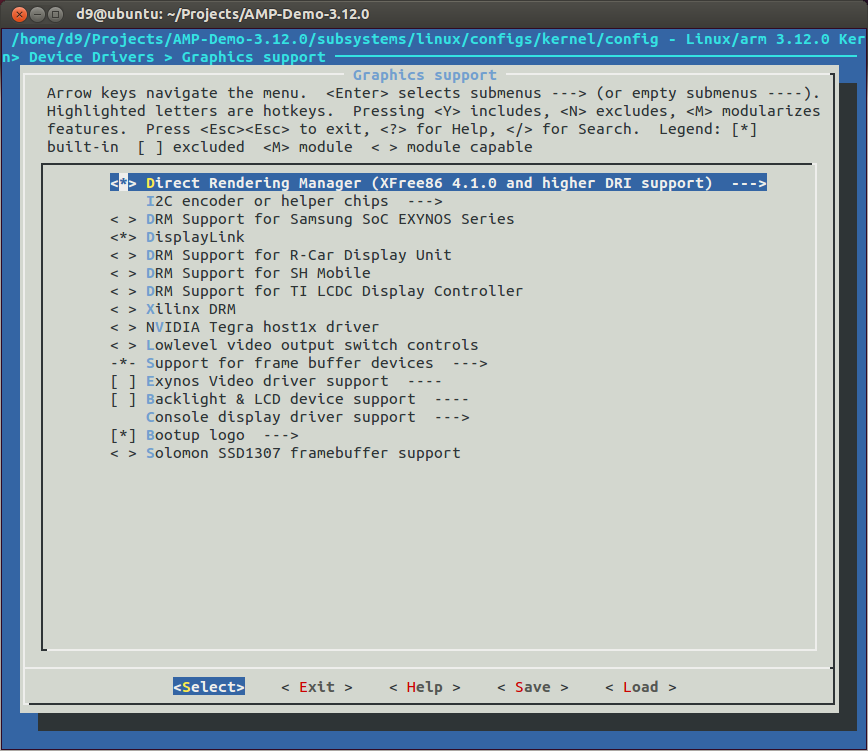
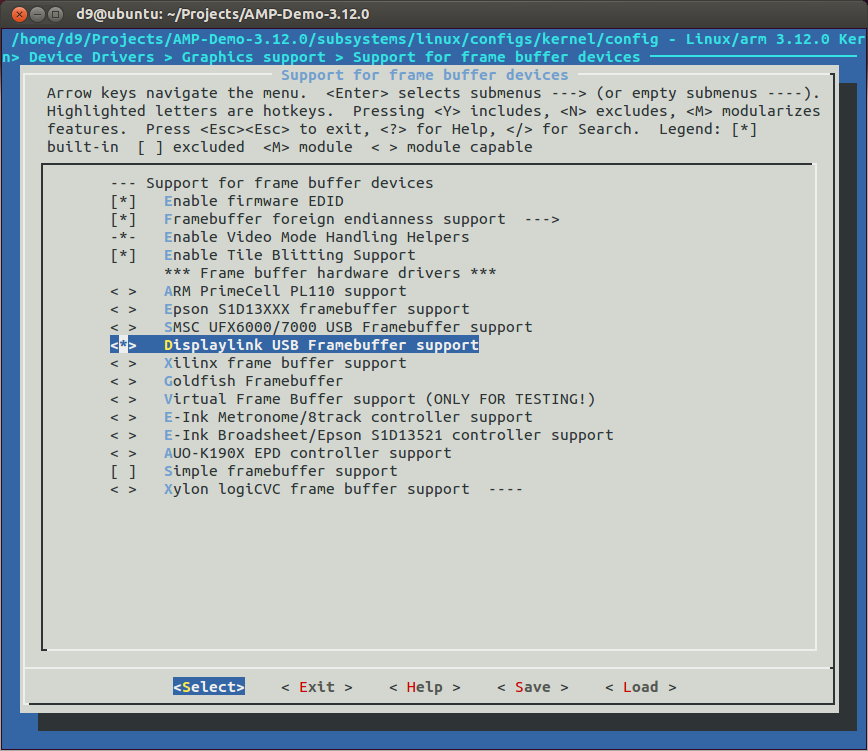
  11. Next we need to configure Linux kernel for PetaLinux and we need to enable all options required by ADV7511. AnalogDevices kernel support special configuration option 'zynq_xcomm_adv7511_defconfig', but we cannot run it with PetaLinux. So, we have to pre-configure kernel separately ('make ARCH=arm zynq_xcomm_adv7511_defconfig') and just copy resulted config into 'ZedBoard-HDMI/subsystems/linux/configs/kernel'. So, I did it and also copied it into PetaLinux Kernel configs directory '/opt/petalinux-v2013.10-final/etc/template/project/template-zynq/subsystems/linux/configs/kernel'. So, I can later reuse it. Also notice that kernel default config file have dot in the front and PetaLinux files don't.
    Anyway, here is link to my resulted kernel config file: https://blog.idv-tech.com/wp-content/uploads/2014/05/config_hdmi_3_14.config
  12. We also, have to modify 'devices tree' generated by PetaLinux for our project. AnalogDecices Linux kernel have template for ZedBoard which you can find in 'arch/arm/boot/dts/zynq-zed-adv7511.dts', so we basically have to copy missing devices from AD into our tree.
    Link to my resulted DTS file for ZedBoard: https://blog.idv-tech.com/wp-content/uploads/2014/05/adv7511_dts.config.
  13. We are basically done. At this point you my want to modify PetaLinux project, for example, include Qt5 library and test app to check frame buffer device later. I covered this topics in my previous post, so I wont repeat it here.

    Build Petalinux project, create BOOT.BIN and copy it together with Linux image file 'image.ub' on SD card:

    petalinux-build
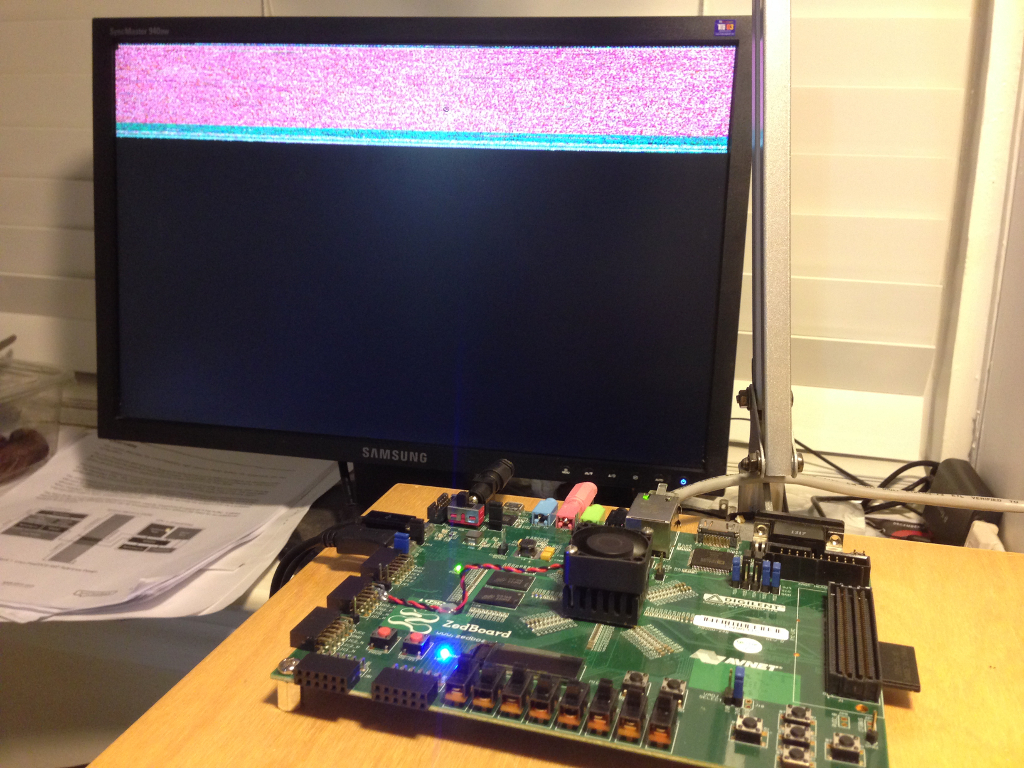
    petalinux-package --boot --fsbl ../ZedBoard-HDMI-FSBL/Release/ZedBoard-HDMI-FSBL.elf --fpga ../ZedBoard-HDMI-HW/system_top.bit --uboot --force -o images/linux/BOOT.BIN

  14. Insert SD card into slot of ZedBoard and turn it on. During boot kernel should detect ADV7511(hdmi) and ADAU1761(sound) devices and create '/dev/fb0' device.So, below partial bootlog from my ZedBoard:
  15. ...
    [drm] Initialized drm 1.1.0 20060810
    /analogdevices-kernel/drivers/gpu/drm/adi_axi_hdmi/axi_hdmi_drv.c:axi_hdmi_platform_probe[176]
    platform 70e00000.axi_hdmi: Driver axi-hdmi requests probe deferral
    ...
    adv7511-hdmi-snd adv7511_hdmi_snd.2: adv7511 <-> 75c00000.axi-spdif-tx mapping ok
    ...
    zed-adau1761-snd zed_sound.3: adau-hifi <-> 77600000.axi-i2s mapping ok
    ...
    Console: switching to colour frame buffer device 180x56
    axi-hdmi 70e00000.axi_hdmi: fb0:  frame buffer device
    axi-hdmi 70e00000.axi_hdmi: registered panic notifier
    [drm] Initialized axi_hdmi_drm 1.0.0 20120930 on minor 0
    /analogdevices-kernel/drivers/rtc/hctosys.c: unable to open rtc device (rtc0)
    ALSA device list:
      #0: HDMI monitor
      #1: ZED ADAU1761
    Freeing unused kernel memory: 23356K (c062b000 - c1cfa000)
    INIT: version 2.88 booting
    Starting Bootlog daemon: bootlogd.
    ...
    
     _____       _           _      _
    | ___ \     | |         | |    (_)
    | |_/ / ___ | |_   __ _ | |     _  _ __   _   _ __  __
    |  __/ / _ \| __| / _` || |    | || '_ \ | | | |\ \/ /
    | |   |  __/| |_ | (_| || |____| || | | || |_| | >  <
    \_|    \___| \__| \__,_|\_____/|_||_| |_| \__,_|/_/\_\
    
    PetaLinux v2013.10 (Yocto 1.4) ZedBoard ttyPS0
    
    ZedBoard login: root
    Password:
    login[923]: root login  on `ttyPS0'
    
    root@ZedBoard:~# ls /dev/fb0
    /dev/fb0
    root@ZedBoard:~# uname -a
    Linux ZedBoard 3.14.0-g681a2d8-dirty #2 SMP PREEMPT Sun May 25 22:46:28 EDT 2014 armv7l GNU/Linux
    root@ZedBoard:~#
    
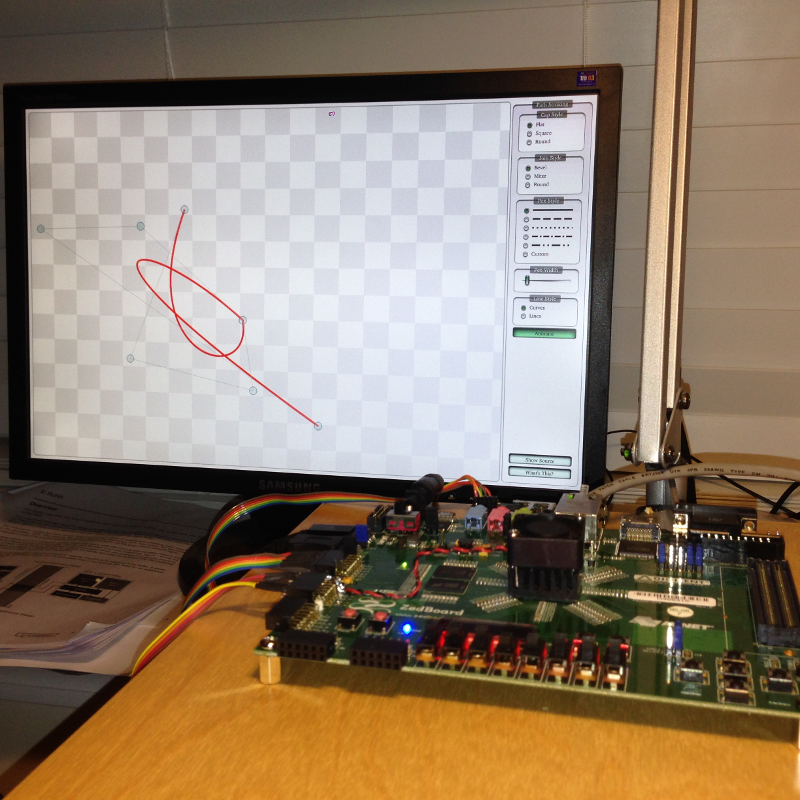
  16. This is basically it - once you have a framebuffer device you can start using it. So I ran my Qt5 test app and it worked. We obviously don't have any hardware acceleration with this HDL design, but we got basic FB device and HDMI output. Congratulations!

Howto create and package IP using Xilinx Vivado 2014.1

A small, step-by-step tutorial on how to create and package IP. Just as an example, I will create 3-to-8 decoder IP in Xilinx Vivado 2014.1 and connect it to Zynq SPI chip select pins. This is not a Verilog tutorial, so I will give a minimum information required to create Verilog sources.

  1. Run Xilinx Vivado and create new RTL project - name it Logic_Decoder_3-to-8; Specify Verilog as target language; also specify Zynq-7000 for a part family.
  2. zynq14_1

  3. Next step to create IP source file. To do it click on 'Add Sources' in 'Project Manager' group in the Vivado project 'Flow Navigator'.
  4. In a 'Add Sources' dialog select 'Add or Create Design Sources'.
  5. Then 'Create File...', specify new 'File Name' and click 'Ok' and 'Finish' buttons to close dialogs.
  6. zynq14_2

  7. Next, Vivado will open 'Define Module' dialog where we have to specify inputs and outputs. Since we are creating 3 to 8 decoder, set type of input and output as 'Bus' and set appropriate bus width. Set port names to whatever makes more sense to you, but remember that 'in' and 'out' are reserved words, so you have to be a little creative here. Click 'Ok' close dialog.
  8. zynq14_3

  9. Now, in a sources window of the Vivado, you can see Verilog source file we just created. Open it.
  10. zynq14_4

  11. This is just a empty source file created using template, but it already have our module input and output defined and all we need to do is to modify it to do an actual address decoding. Below is the one possible solution to such problem.
  12. zynq14_5

    module decoder_3to8(
        input [2:0] d_inp,
        output [7:0] d_out
        );
        
    assign d_out = (d_inp == 3'b000) ? 8'b00000001 :
                   (d_inp == 3'b001) ? 8'b00000010 :
                   (d_inp == 3'b010) ? 8'b00000100 :
                   (d_inp == 3'b011) ? 8'b00001000 :
                   (d_inp == 3'b100) ? 8'b00010000 :
                   (d_inp == 3'b101) ? 8'b00100000 :
                   (d_inp == 3'b110) ? 8'b01000000 :
                   8'b10000000;
        
    endmodule
    
  13. Make changes to the source and save it. Now you can run simulation and synthesis and analize the resulted design, but I will skip it to make this tutorial simpler. I also using this very simple verilog module and know it works, but still did verification on it so can just copy-paste it.
  14. Now, let's package it. In a 'Tools' menu of the Vivado select 'Create and Package IP...'. Later select 'Package your current project' option, include '.xci' files and 'Finish' new IP creation.
  15. Change IP identification information if you wish, as well as, any other property for new IP.
  16. After you done with changes, click on 'Review and Package' menu on the bottom of the list and then click in 'Package IP' button.
  17. zynq14_7

  18. We are done with this IP, close this project.
  19. Now lets use our new 3-to-8 decoder IP. Just for example, I will create new, very basic Zynq design for ZedBoard and will decode one of it's SPI port outputs to 8. And will make them external on one of the ZedBoard PMOD connector. I will not cover creation of the Zynq block design, since I did it in my previous posts.
  20. So, below my simple Zynq block design. Now, I have to enable SPI port. Double click on 'Zynq processing system', go to 'MIO Configuration' and enable 'SPI0' port. As you can see it can only have maximum 3 Slave Select (or Chip Select) pin and sometimes its not enough.
  21. zynq14_8

  22. Next we need to add our 3-to-8 decoder module to block diagram, but before we can do it, we must add it's repository to our project IP manager. So, in a 'Tools' menu select 'Project Settings' and then click on 'IP' icon.
  23. In 'IP' management dialog click on 'Add Repository...' button and specify our decoder IP project folder. Vivado will scan it, should find decoder IP and add it in found IP list. Click 'Apply' and then 'Ok' to close dialog.
  24. zynq14_9

  25. We can add decoder IP to our block diagram. Click on 'Add IP', typo decoder IP name and add it.
  26. Now we have to connect 3 SPI SS outputs to our decoder input, but we can't. Problem is that decoder inputs treated as a 'bus' and SPI SS outputs as individual 'wires'. One of the possible solution is to concatenate individual wires. In order to do it add Xilinx 'Concat' IP and modify it, so it will have 3 inputs.
  27. zynq14_10

  28. Now we should be able to connect all blocks together. Specifically, connect SPI0_SS0, SPI0_SS1 and SPI0_SS2 to 'Concat' block input 0,1 and 2. Them, connect 'Concat' output to our 3-to-8 decoder IP and finally make decoder outputs 'External'. I will also rename output port to 'SPI0_CS'.
  29. zynq14_11

  30. This is basically it. Now we have to create 'constraints' file and specify in it Zynq PACKAGE_PIN for some or all pins of the 'SPI_CS0' port. For example you may want to export only 4 CS pins. Something like this:
  31. set_property IOSTANDARD LVCMOS33 [get_ports SPI0_SCLK]
    set_property IOSTANDARD LVCMOS33 [get_ports SPI0_MISO]
    set_property IOSTANDARD LVCMOS33 [get_ports SPI0_MOSI]
    set_property IOSTANDARD LVCMOS33 [get_ports SPI0_CS[0]]
    set_property IOSTANDARD LVCMOS33 [get_ports SPI0_CS[1]]
    set_property IOSTANDARD LVCMOS33 [get_ports SPI0_CS[2]]
    set_property IOSTANDARD LVCMOS33 [get_ports SPI0_CS[3]]
    
    set_property PACKAGE_PIN AA9 [get_ports SPI0_SCLK]
    set_property PACKAGE_PIN Y10 [get_ports SPI0_MISO]
    set_property PACKAGE_PIN AA11 [get_ports SPI0_MOSI]
    set_property PACKAGE_PIN W12 [get_ports SPI0_CS[0]]
    set_property PACKAGE_PIN W11 [get_ports SPI0_CS[1]]
    set_property PACKAGE_PIN V10 [get_ports SPI0_CS[2]]
    set_property PACKAGE_PIN W8 [get_ports SPI0_CS[3]]
    
  32. Later, in a software project, you will need to enable special option for SPI driver to use 'Slave Select' pins as encoded address. But that is part of another tutorial, but this one finished. Good luck!

Zynq MMC/SD controller with Linux Kernel 3.12.x and later.

Just a quick note regarding Zynq SD card controller support in Linux Kernel 3.13.x and later. Apparently, Xilinx used industry standard IP blocks for Zynq PS hardware, including SDHC controller. And now they are switching away from 'custom' drivers. For example, Xilinx Zynq PS I2C now called 'Cadence I2C Controller' and new name for Zynq SDHC controller is 'Arasan'.

To make SD card work again with latest kernels, we need to select appropriate option during Linux kernel configuration and make changes for 'ps7_sd_0' and/or 'ps7_sd_1' in devices tree file(DTS). Arasan driver also looking for different 'clock-names'.

Below SD controller section of my DTS file for ZedBoard:

ps7_sd_0: ps7-sdio@e0100000 {
	clock-frequency = <50000000>;
	clock-names = "clk_xin", "clk_ahb";
	clocks = <&clkc 21>, <&clkc 32>;
	compatible = "arasan, sdhci-8.9a";
	interrupt-parent = <&ps7_scugic_0>;
	interrupts = <0 24 4>;
	reg = <0xe0100000 0x1000>;
	xlnx,has-cd = <0x1>;
	xlnx,has-power = <0x0>;
	xlnx,has-wp = <0x1>;
} ;

zynq12_001

Howto build Qt 5.2.1 for Xilinx Zynq.

    Update for Qt 5.3.2: https://blog.idv-tech.com/2014/10/15/building-and-configuring-qt5-tslib-and-evtest-for-arm-xilinx-zynq/.

    This is a small how-to build latest Qt 5.2.1 for Zynq and use it with PetaLinux 2013.10 projects. I'm using 64 bit Ubuntu 13.10 as a host, with Xilinx Vivado 2013.4 and ZedBoard
    'Rev. D' as a target. If this howto works for you, especially if you using it on other boards please let me know, so I can push to Qt Zynq support changes.

  1. Download and extract Qt everywhere sources to your home/Download directory:

    wget http://download.qt-project.org/official_releases/qt/5.2/5.2.1/single/qt-everywhere-opensource-src-5.2.1.tar.gz
    tar -zxvf qt-everywhere-opensource-src-5.2.1.tar.gz

  2. Qt5 don't yet support Zynq device, so we need to add it. You can download and extract prepared files(linux-arm-xilinx-zynq-g++.tar.gz) to 'qt-everywhere-opensource-src-5.2.1/qtbase/mkspecs/devices/linux-arm-xilinx-zynq-g++' folder. Or you create files yourself:
    • In a 'qt-everywhere-opensource-src-5.2.1/qtbase/mkspecs/devices' create new folder named 'linux-arm-xilinx-zynq-g++'.
    • In a 'linux-arm-xilinx-zynq-g++' create 'qmake.conf' file:
    • #
      # qmake configuration for linux-g++ using arm-xilinx-g++ compiler
      #
      
      MAKEFILE_GENERATOR      = UNIX
      CONFIG                 += incremental gdb_dwarf_index
      QMAKE_INCREMENTAL_STYLE = sublib
      
      include(../../common/linux.conf)
      include(../../common/gcc-base-unix.conf)
      include(../../common/g++-unix.conf)
      
      load(device_config)
      
      QT_QPA_DEFAULT_PLATFORM = linuxfb
      
      # modifications to g++.conf
      QMAKE_CC                = $${CROSS_COMPILE}gcc
      QMAKE_CXX               = $${CROSS_COMPILE}g++
      QMAKE_LINK              = $${QMAKE_CXX}
      QMAKE_LINK_SHLIB        = $${QMAKE_CXX}
      
      # modifications to linux.conf
      QMAKE_AR                = $${CROSS_COMPILE}ar cqs
      QMAKE_OBJCOPY           = $${CROSS_COMPILE}objcopy
      QMAKE_NM                = $${CROSS_COMPILE}nm -P
      QMAKE_STRIP             = $${CROSS_COMPILE}strip
      
      QMAKE_CFLAGS           += -I$$[QT_SYSROOT]/include -DZYNQ
      QMAKE_CXXFLAGS         += -Wno-psabi -I$$[QT_SYSROOT]/include -DZYNQ
      QMAKE_LFLAGS           += -L$$[QT_SYSROOT]/lib
      
      QMAKE_CFLAGS           += -march=armv7-a -mcpu=cortex-a9 -mtune=cortex-a9 -mfpu=neon -pipe -fomit-frame-pointer
      QMAKE_CXXFLAGS         += $$QMAKE_CFLAGS
      
      deviceSanityCheckCompiler()
      
      load(qt_config)
      
    • And also 'qplatformdefs.h' file:
    • /****************************************************************************
      **
      ** Copyright (C) 2013 Digia Plc and/or its subsidiary(-ies).
      ** Contact: http://www.qt-project.org/legal
      **
      ** This file is part of the qmake spec of the Qt Toolkit.
      **
      ** $QT_BEGIN_LICENSE:LGPL$
      ** Commercial License Usage
      ** Licensees holding valid commercial Qt licenses may use this file in
      ** accordance with the commercial license agreement provided with the
      ** Software or, alternatively, in accordance with the terms contained in
      ** a written agreement between you and Digia.  For licensing terms and
      ** conditions see http://qt.digia.com/licensing.  For further information
      ** use the contact form at http://qt.digia.com/contact-us.
      **
      ** GNU Lesser General Public License Usage
      ** Alternatively, this file may be used under the terms of the GNU Lesser
      ** General Public License version 2.1 as published by the Free Software
      ** Foundation and appearing in the file LICENSE.LGPL included in the
      ** packaging of this file.  Please review the following information to
      ** ensure the GNU Lesser General Public License version 2.1 requirements
      ** will be met: http://www.gnu.org/licenses/old-licenses/lgpl-2.1.html.
      **
      ** In addition, as a special exception, Digia gives you certain additional
      ** rights.  These rights are described in the Digia Qt LGPL Exception
      ** version 1.1, included in the file LGPL_EXCEPTION.txt in this package.
      **
      ** GNU General Public License Usage
      ** Alternatively, this file may be used under the terms of the GNU
      ** General Public License version 3.0 as published by the Free Software
      ** Foundation and appearing in the file LICENSE.GPL included in the
      ** packaging of this file.  Please review the following information to
      ** ensure the GNU General Public License version 3.0 requirements will be
      ** met: http://www.gnu.org/copyleft/gpl.html.
      **
      **
      ** $QT_END_LICENSE$
      **
      ****************************************************************************/
      
      #include "../../linux-g++/qplatformdefs.h"
      
  3. QT_QPA_DEFAULT_PLATFORM variable set to Linux Framebuffer and if your hardware design supports something else you may want to change it. Or you can always control it thru QT_QPA_PLATFORM env. variable and leave default to simplest 'linuxfb'. You may also want to modify CFLAGS and CXXFLAGS here.
  4. Set CROSS_COMPILE variable and source Xilinx tools settings:

    export CROSS_COMPILE=arm-xilinx-linux-gnueabi-
    source /opt/Xilinx/Vivado/2013.4/settings64.sh

  5. Now we can run Qt 'configure' utility, Below, configuration from my building script. Notice I disabled OpenGL ES support since my hardware don't have it yet, but your might, so you may want to include egl support.
  6. ./configure -prefix /opt/Qt/5.2.1 \
    	-device linux-arm-xilinx-zynq-g++ \
    	-device-option CROSS_COMPILE=arm-xilinx-linux-gnueabi- \
    	-release \
    	-no-qml-debug \
    	-reduce-relocations \
    	-qt-zlib \
    	-qt-libpng \
    	-qt-libjpeg \
    	-qt-freetype \
    	-qt-harfbuzz \
    	-qt-pcre \
    	-no-xcb \
    	-qt-xkbcommon \
    	-no-opengl \
    	-no-eglfs \
    	-no-kms \
    	-confirm-license \
    	-opensource \
    	-no-icu \
    	-no-pch \
    	-verbose
    
  7. Configure will build 'qmake' first and generate 'Makefiles' for all the components. Check your output in details and verify it match your configuration. Below output in my case:
  8. Configure summary
    
    Building on:   linux-g++ (x86_64, CPU features: mmx sse sse2)
    Building for:  devices/linux-arm-xilinx-zynq-g++ (arm, CPU features: neon)
    Platform notes:
    
                - Also available for Linux: linux-kcc linux-icc linux-cxx
            
    qmake vars .......... styles += mac fusion windows DEFINES += QT_NO_MTDEV 
    DEFINES += QT_NO_LIBUDEV DEFINES += QT_NO_XCB sql-drivers =  sql-plugins =  sqlite qmake switches ......... 
    
    Build options:
      Configuration .......... accessibility audio-backend c++11 clock-gettime clock-monotonic compile_examples 
     concurrent cross_compile evdev eventfd freetype full-config getaddrinfo getifaddrs harfbuzz iconv inotify
     ipv6ifname large-config largefile linuxfb medium-config minimal-config mremap neon nis no-pkg-config pcre 
     png posix_fallocate qpa qpa reduce_exports reduce_relocations release rpath shared small-config xkbcommon-qt zlib 
      Build parts ............ libs examples
      Mode ................... release
      Using C++11 ............ yes
      Using PCH .............. no
      Target compiler supports:
        iWMMXt/Neon .......... no/yes
    
    Qt modules and options:
      Qt D-Bus ............... no
      Qt Concurrent .......... yes
      Qt GUI ................. yes
      Qt Widgets ............. yes
      JavaScriptCore JIT ..... yes (To be decided by JavaScriptCore)
      QML debugging .......... no
      Use system proxies ..... no
    
    Support enabled for:
      Accessibility .......... yes
      ALSA ................... no
      CUPS ................... no
      FontConfig ............. no
      FreeType ............... qt
      HarfBuzz ............... qt
      Iconv .................. yes
      ICU .................... no
      Image formats: 
        GIF .................. yes (plugin, using bundled copy)
        JPEG ................. yes (plugin, using bundled copy)
        PNG .................. yes (in QtGui, using bundled copy)
      Glib ................... no
      GTK theme .............. no
      Large File ............. yes
      mtdev .................. no
      Networking: 
        getaddrinfo .......... yes
        getifaddrs ........... yes
        IPv6 ifname .......... yes
        OpenSSL .............. no
      NIS .................... yes
      OpenGL ................. no
      OpenVG ................. no
      PCRE ................... yes (bundled copy)
      pkg-config ............. no 
      PulseAudio ............. no
      QPA backends: 
        DirectFB ............. no
        EGLFS ................ no
        KMS .................. no
        LinuxFB .............. yes
        XCB .................. no
      Session management ..... yes
      SQL drivers: 
        DB2 .................. no
        InterBase ............ no
        MySQL ................ no
        OCI .................. no
        ODBC ................. no
        PostgreSQL ........... no
        SQLite 2 ............. no
        SQLite ............... yes (plugin, using bundled copy)
        TDS .................. no
      udev ................... no
      xkbcommon .............. yes (bundled copy)
      zlib ................... yes (bundled copy)
    
    NOTE: Qt is using double for qreal on this system. This is binary incompatible against Qt 5.1.
    Configure with '-qreal float' to create a build that is binary compatible with 5.1.
    Info: creating cache file /home/d9/Projects/qt5_build_test/qt-everywhere-opensource-src-5.2.1/qtbase/.qmake.cache
    
    Qt is now configured for building. Just run 'gmake'.
    Once everything is built, you must run 'gmake install'.
    Qt will be installed into /opt/Qt/5.2.1
    
    Prior to reconfiguration, make sure you remove any leftovers from
    the previous build.
    
  9. Build and install Qt. It will be installed in a directory you set as a prefix during configuration.

    cd qt-everywhere-opensource-src-5.2.1/qtbase/
    gmake & gmake install

  10. Now, lets add Qt libraries and couple of Qt example binaries to PetaLinux project. Go to your PetaLinux project directory and create Qt component using 'libs' template.

    petalinux-create -t libs -n qt-5.2.1 --enable

  11. We don't need template created files, so delete them.

    cd components/libs/qt-5.2.1/
    rm libqt*

  12. Copy prebuilt Qt library files to 'lib' subdirectory, qt fonts and plugin directories also to 'lib' and a couple of Qt examples to 'bin' subdirectory:

    cp -Pr /opt/Qt/5.2.1/lib .
    cp -Pr /opt/Qt/5.2.1/plugins/ ./lib/
    mkdir bin
    cp /opt/Qt/5.2.1/examples/widgets/painting/pathstroke/pathstroke bin/pathstroke
    cp /opt/Qt/5.2.1/examples/widgets/mainwindows/mainwindow/mainwindow bin/mainwindow

  13. We also have to set a few enviromental variables on a target rootfs, so lets create 'profile.qt-5.2.1' file. Last one is for 'tslib', so if you don't use it you may delete it. Also, depending on your setup - you may need to change this or add other variables here.
  14. export QT_PLUGIN_PATH=/usr/lib/plugins
    export QT_QPA_FONTDIR=/usr/lib/fonts
    export QT_QPA_PLATFORM_PLUGIN_PATH=/usr/lib/plugins/platforms
    export QT_QPA_PLATFORM=linuxfb
    export QT_QPA_GENERIC_PLUGINS=tslib:/dev/input/event0
    
  15. Now we have to modify our PetaLinux component Makefile. We got nothing to build, but need to install our Qt5 library files to target rootfs.
  16. ifndef PETALINUX
    $(error "Error: PETALINUX environment variable not set. Try to source the settings.sh file")
    endif
    
    include libs.common.mk
    
    LIB=libqt_5_2_1
    
    all: build install
    
    .PHONY: build
    build:
    
    install:
    	#Install libraries and fonts to the rootfs.
    
    	mkdir -p $(TARGETDIR)/usr/lib
    	USER=your_user_name
    	GROUP=your_user_group
    	rsync -rav ./bin/* $(TARGETDIR)/usr/bin/
    	rsync -rav ./lib/* $(TARGETDIR)/usr/lib/
    
    	#Install the script to ensure the font directory is properly specified.
    	mkdir -p $(TARGETDIR)/etc/profile.d
    	cp profile.qt-5.2.1 $(TARGETDIR)/etc/profile.d/profile.qt-5.2.1
    
    clean:
    
  17. Last configuration step is to include 'libstdc++6' to target rootfs, since Qt is a C++ library and depends on it.

    petalinux-config -c rootfs

    Then go to 'Filesystem Packages' -> 'Base' -> 'External-xilinx-toolchain' -> Enable 'libstdc++6'.

  18. Thats it. Rebuild PetaLinux project, transfer image.ub file to SD card. Qt5 library will add about 20M to image size, so it may not fit into reserved space and you may need to adjust appropriate u-boot variable (loadaddr, netstart...). After boot you we can run 'pathstroke' and 'mainwindow' Qt example apps.
  19. zynq9_001

The easiest way to add screen to ZedBoard.

While waiting for my custom TFT panel board to be build and Zynq IP created, I'm decided to go ahead and build Qt libraries and start porting application. In order to test my application I need linux video framebuffer of any sort and easiest way to add screen to ZedBoard is to use DisplayLink Video USB-to-DVI adaptor. I got first generation of DisplayLink adaptor from Kengsington model K33907.

I did use Xilinx PetaLinux 13.10 under Ubuntu 13.10 and kernel v3.12.0 from Xilinx git repo: and I did reuse PetaLinux project I created using ZedBoard CTT hardware design from ZedBoard_CTT_v2013_2_130807 tutorial. But it works just as good with PetaLinux 13.10 default linux kernel 3.8.11.

  1. First, we need to reconfigure linux kernel to include a driver and enable some framebuffer related options. So, run kernel config utility, go to 'Device Drivers' -> 'Graphics support' and make appropriate changes:

    cd ~/Projects/my_zedboard_petalinux_project/
    petalinux-config -c kernel

    zynq6_001

    zynq6_002

  2. Clean PetaLinux project from previous build and rebuild it:

    petalinux-build -x mrproper
    petalinux-build

  3. Connect DisplayLink USB adaptor to USB OTG port of ZedBoard.
  4. Check JP2 and JP3 jumpers on the ZedBoard - both must be shorted to set USB in a Host mode.
  5. Now transfer new image.ub to SD card if you using SD card. Or if you using 'tftp' to load kernel - just reset ZedBoard.
  6. During boot process you should see something similar to the code below and if you do this means DisplayLink driver works, it found video adapter connected to USB, got EDID with modes from monitor and set appropriate mode. In my case it 1440x900 59Hz:

    usb 1-1: new high-speed USB device number 2 using xusbps-ehci
    usb 1-1: New USB device found, idVendor=17e9, idProduct=0033
    usb 1-1: New USB device strings: Mfr=1, Product=2, SerialNumber=3
    usb 1-1: Product: K33907
    usb 1-1: Manufacturer: DisplayLink
    usb 1-1: SerialNumber: 0033-105190
    udlfb: DisplayLink K33907 - serial #0033-105190
    udlfb: vid_17e9&pid_0033&rev_0002 driver's dlfb_data struct at ceb5b000
    udlfb: console enable=1
    udlfb: fb_defio enable=1
    udlfb: shadow enable=1
    udlfb: vendor descriptor not available (-32)
    udlfb: allocated 4 65024 byte urbs
    udlfb: 1440x900 @ 59 Hz valid mode
    udlfb: 720x400 @ 70 Hz valid mode
    udlfb: 640x480 @ 60 Hz valid mode
    udlfb: 640x480 @ 67 Hz valid mode
    udlfb: 640x480 @ 72 Hz valid mode
    udlfb: 640x480 @ 75 Hz valid mode
    udlfb: 800x600 @ 56 Hz valid mode
    udlfb: 800x600 @ 60 Hz valid mode
    udlfb: 800x600 @ 72 Hz valid mode
    udlfb: 800x600 @ 75 Hz valid mode
    udlfb: 832x624 @ 75 Hz valid mode
    udlfb: 1024x768 @ 60 Hz valid mode
    udlfb: 1024x768 @ 70 Hz valid mode
    udlfb: 1024x768 @ 75 Hz valid mode
    udlfb: 1280x1024 @ 75 Hz valid mode
    udlfb: 1152x864 @ 75 Hz valid mode
    udlfb: 1440x900 @ 60 Hz valid mode
    udlfb: 1440x900 @ 75 Hz valid mode
    udlfb: 1280x1024 @ 60 Hz valid mode
    udlfb: 1280x960 @ 60 Hz valid mode
    udlfb: 1152x864 @ 75 Hz valid mode
    udlfb: Reallocating framebuffer. Addresses will change!
    udlfb: 1440x900 @ 59 Hz valid mode
    udlfb: set_par mode 1440x900
    udlfb: open /dev/fb0 user=0 fb_info=c0889400 count=1
    udlfb: set_par mode 1440x900
    Console: switching to colour frame buffer device 180x56
    udlfb: set_par mode 1440x900
    udlfb: DisplayLink USB device /dev/fb0 attached. 1440x900 resolution. Using 5064K framebuffer memory

  7. One of the monitors I tried - didn't send EDID data to the adapter, so I endup creating /etc/fb.modes file with all the modes supported by my monitor.
  8. Now, just verify we got linux framebuffer device in your "/dev/" - it should be "/dev/fb0" and send some random data to it to see if it really works.
  9. cat /bin/busybox > /dev/fb0
    udlfb: open /dev/fb0 user=1 fb_info=cebc5400 count=2
    udlfb: released /dev/fb0 user=1 count=1

  10. If you see random data on screen, similar to the screenshot below - congratulations! Your adapter now works with ZedBoard!
  11. zynq6_005